How to record your first GPS track with NomadTracks
Recording a track is the heart of NomadTracks — and it's deliberately simple. You press one button at the trailhead, put the phone in your pocket, and get a precise GPS line with elevation, speed and pace charts at the end of the day.
This guide walks through your very first recording, from granting location access to reading the charts afterwards.
Get NomadTracks free on the App Store
Open the Live tab
Launch NomadTracks and stay on the Live tab. You'll see the live map with a scale bar, compass and your current coordinates. The stats bar at the top shows altitude, speed, track time and distance.
Allow precise location
On first use, iOS asks for location permission. Choose Allow While Using App and keep Precise Location on — recording quality depends on it. For recordings with the screen off, NomadTracks asks to use background location once you start.
Tap Start at the trailhead
Tap the orange Start button. Recording begins immediately: the stats bar starts counting and your path is drawn on the map as you move. You can lock the phone — live stats stay visible on the Lock Screen and in the Dynamic Island.
Add POIs and photos along the way
Found a spring, a campsite, a viewpoint? Tap the map to drop a point of interest, give it a category and color, and attach a photo. Photos taken during the recording can also be attached to the track itself and appear right on the map.
Stop and save
Back at the car, tap the recording button again and confirm Stop. The track is saved to your library, named, and synced to your other devices via iCloud if sync is enabled.
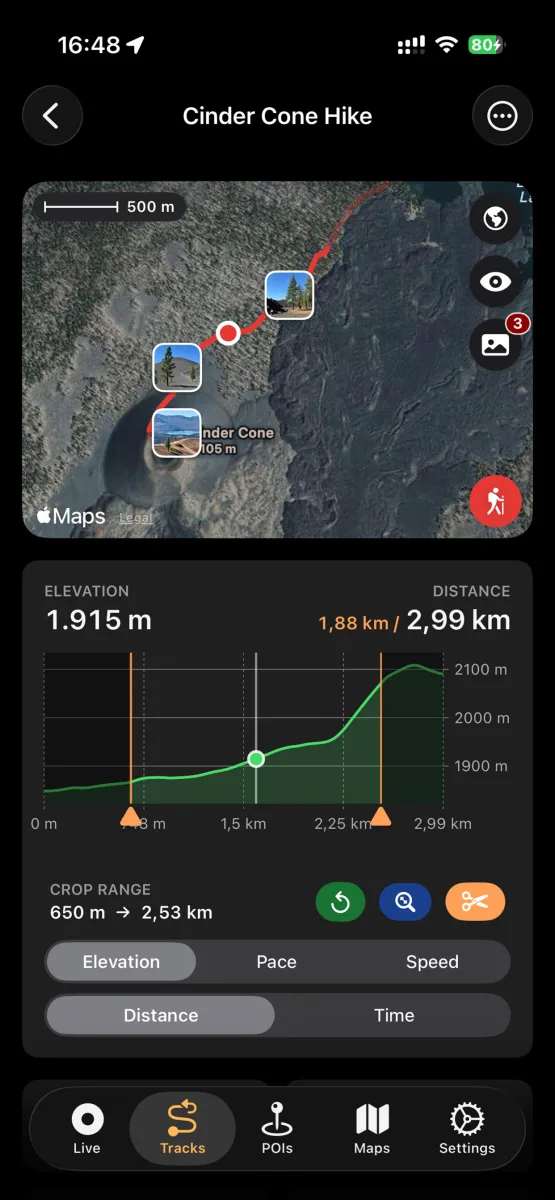
Explore the result
Open the Tracks tab and select your recording. You get the full map with photo waypoints plus elevation, speed and pace charts. Drag across a chart to inspect any point, or use the crop tool to trim GPS noise from the start and end.