How to organize field observations with POIs
On iPhone, iPad or Android, keep observations together for a site visit, field course or trail survey. This example uses a manually placed demonstration point in Yosemite, with notes and an illustrative rating.
The screenshots and video show Android. Follow the same workflow on iOS, using the iOS menu label noted below when moving a POI.
Get NomadTracks free — iOS & Android
Place and describe an observation
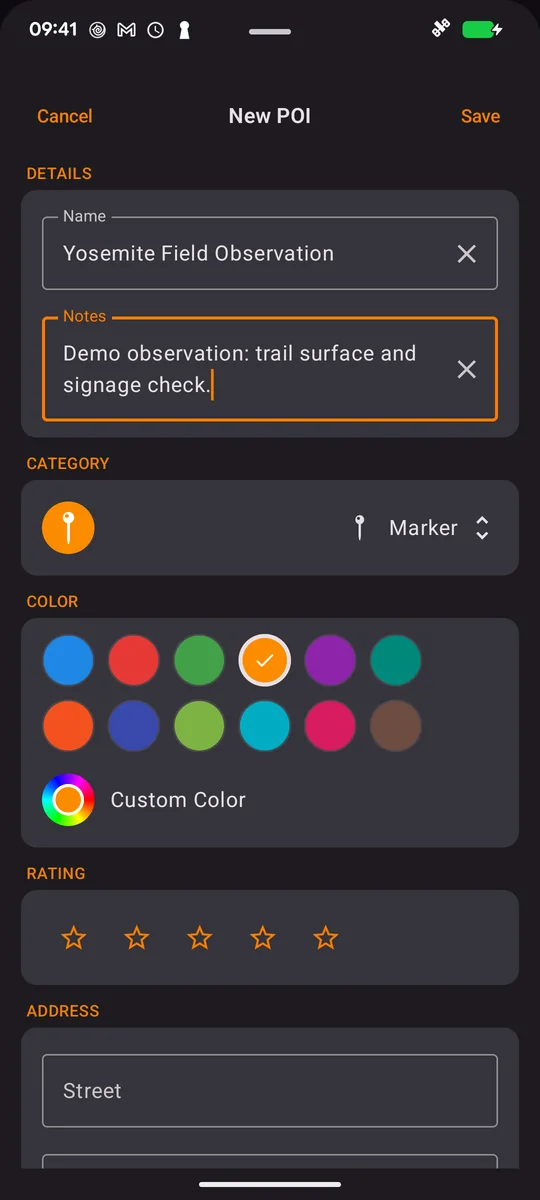
On the Live map, long-press the point you want to mark and create a POI. Give it a recognizable name and write what you observed in Notes.
Choose a category, color and rating
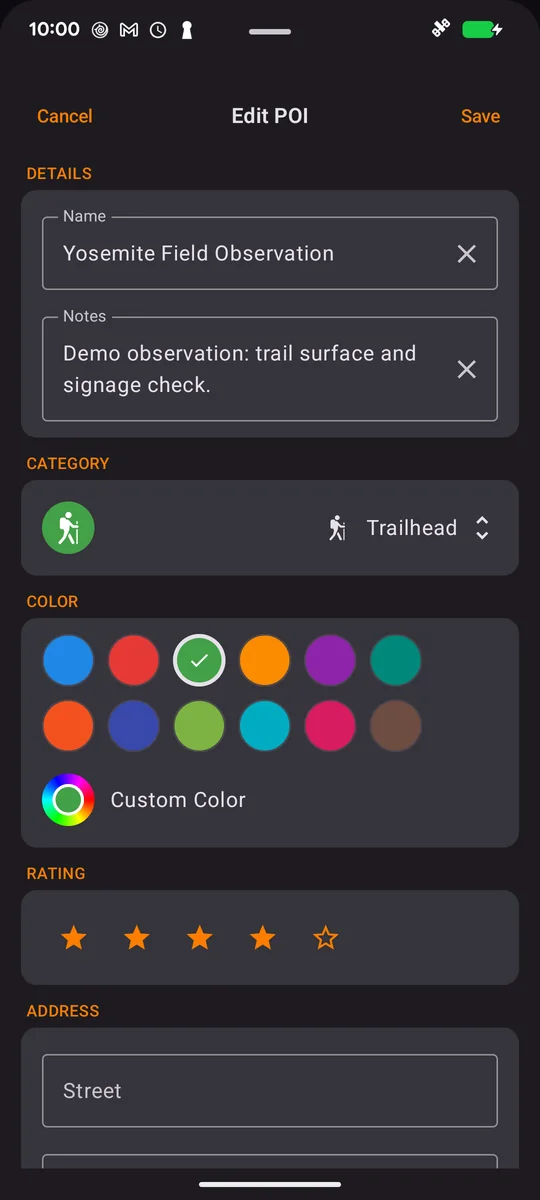
Choose a category that fits the observation, a marker color and, if useful, a star rating. Tap Save. Here, Trailhead, green and four stars are demonstration choices.
Create a survey folder
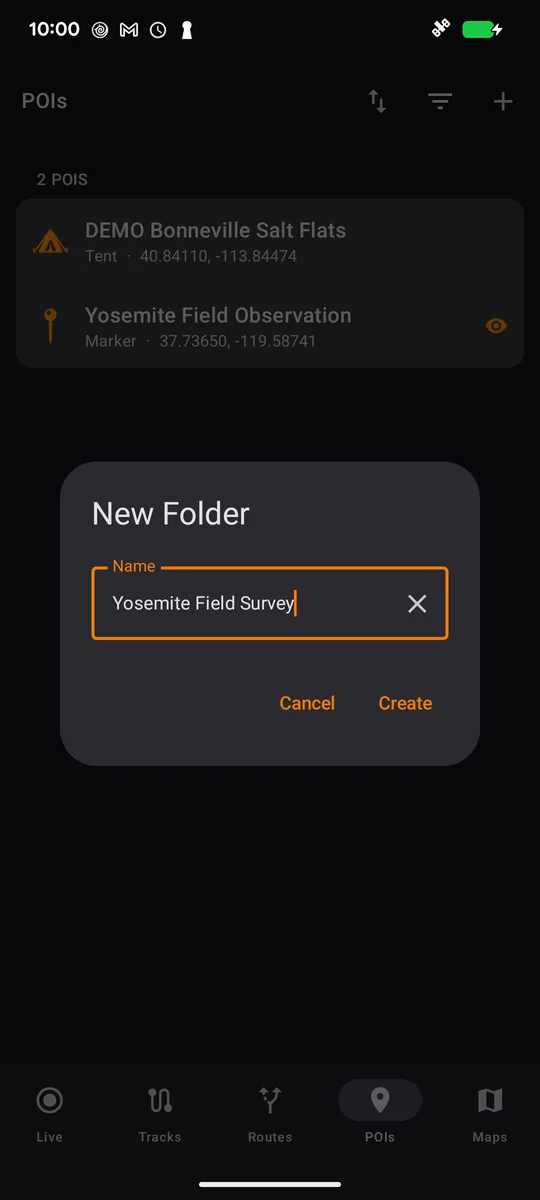
In POIs, tap + → New Subfolder Here. Name the folder for the site or visit.
Move the observation
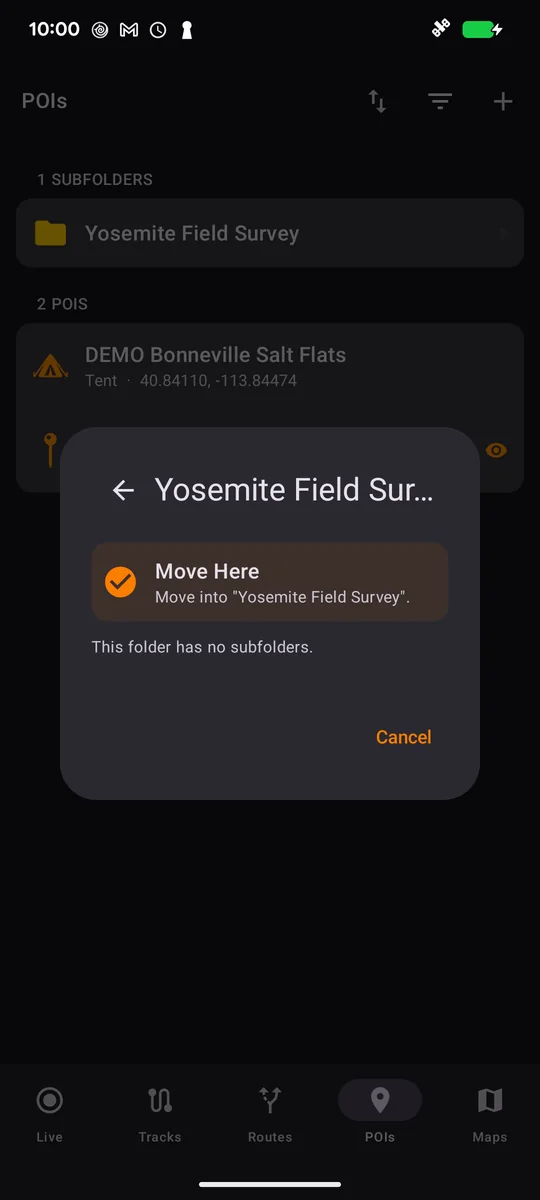
Long-press the POI in the list. On iOS, choose Move to…; on Android, choose Move to Folder…. Open the destination folder and tap Move Here.
Filter the collection
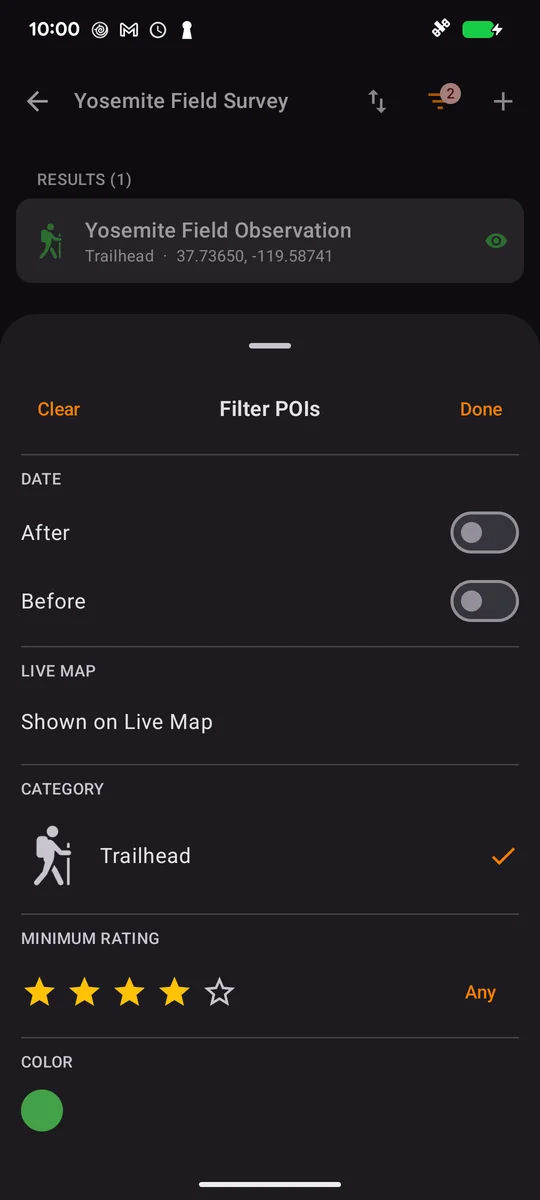
Open the folder and tap Filter. Select a category or minimum rating, then tap Done. Clear the filters when you want the whole collection again.
Choose an export format
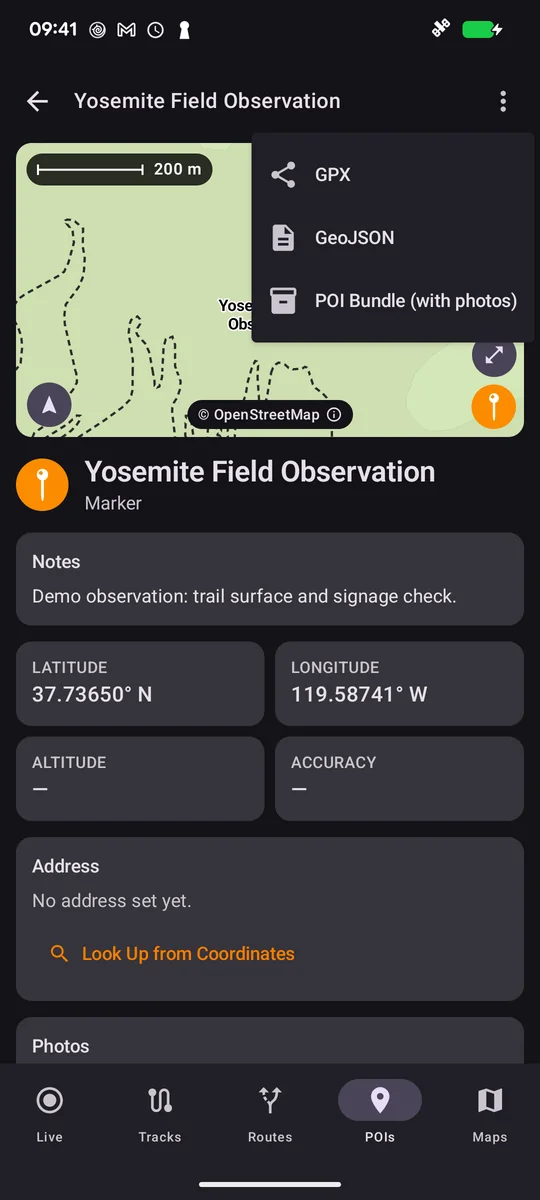
Open the POI, choose More → Export/Share and select the format you need. GPX and GeoJSON are useful for exchanging geographic data; choose a POI Bundle when you need the app’s photos and metadata.
FAQ
Can I place observations without using my current location?
Yes. Navigate to the desired area and long-press the map to choose a point manually.
Why is my POI missing from the list?
Check the folder you are viewing and clear active category, rating, date or visibility filters.
Will GPX include my photos?
Use a NomadTracks POI Bundle when you want to keep photos and app metadata together. GPX is for geographic data rather than a photo archive.